1,首先安装启动Web Station,保证能访问到网站,例如http://192.1.68.1.1:80你自己的nas网站。
2,绑定域名,看教程
3,完成前两步骤,你基本可以输入域名就能访问到你的nas搭建的网站了,例如http://www.xx.com,我这里的方法前提是要开启ipv6
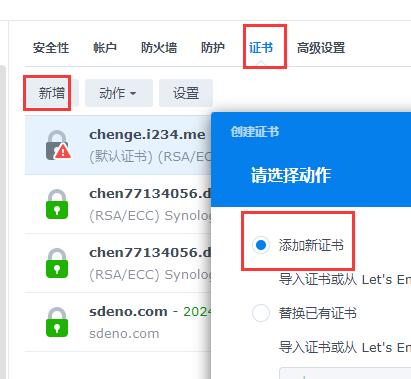
4,给你的域名申请证书,我域名是在阿里云申请免费的拿到证书签名。
5,拿到证书后按照下面步骤进行操作

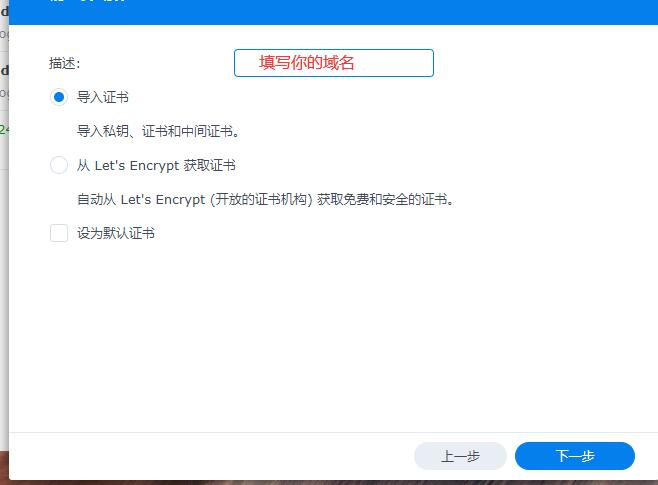
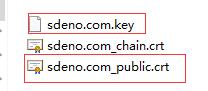
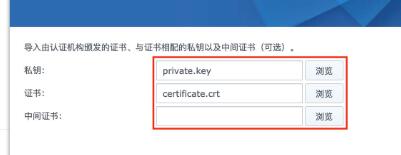
我用的是apache,你导入以下两个证书即可
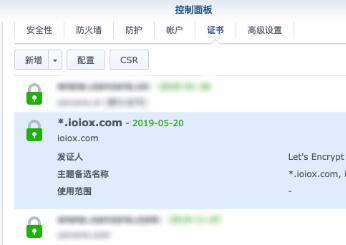
最后点击确定,就能看到如下图你刚刚添加的证书域名了
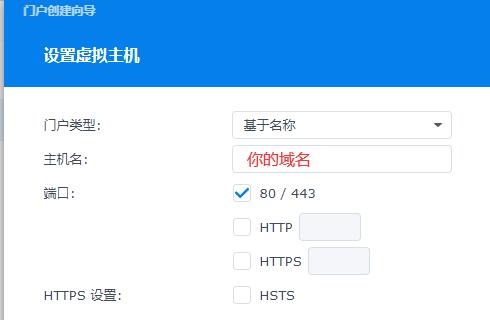
域名配置,如下

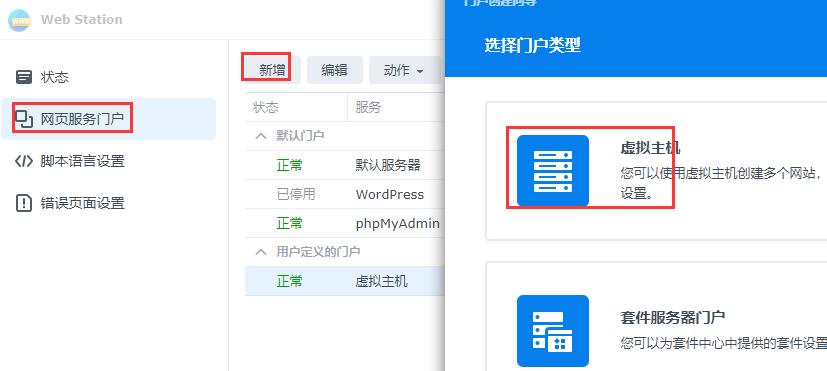
回到Web Station,新增一个虚拟主机
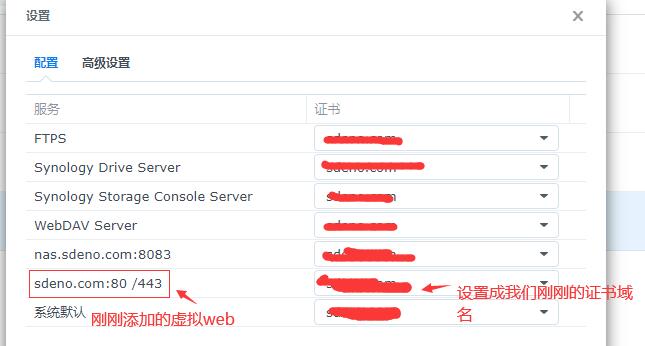
确定之后,你回到证书配置界面,你会看到多了一项刚刚添加的虚拟主机
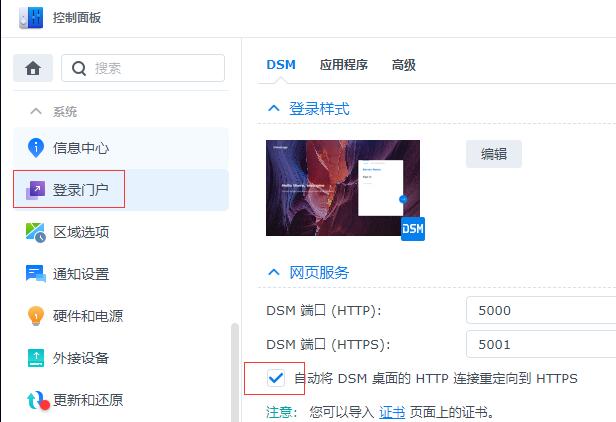
6,http转https重定向设置
让5000端口自动转发到5001端口,这里还是设置一下比较好。
编辑:vi /usr/syno/share/nginx/WWWService.mustache
server {
    listen 80 default_server;
    listen [::]:80 default_server;

    server_name _;

    gzip on;

    {{> /usr/syno/share/nginx/WWW_Main}}
}

改成
server {
    listen 80 default_server;
    listen [::]:80 default_server;

    #server_name _;
    server_name xxx.com;  #这里改成你们自己的域名
    return 301 https://$host$request_uri;
    gzip on;

    {{> /usr/syno/share/nginx/WWW_Main}}
}
推荐在vi /usr/syno/share/nginx/WWWService.mustache文件中添加证书,如:
server {
    #listen 443 default_server ssl;
    #listen [::]:443 default_server ssl;
    listen 443 ssl;
    #server_name _;
    server_name sdeno.com;
    ssl_certificate /volume1/web/sdeno.com.pem;   #将domain.pem替换成您证书的文件名。
    ssl_certificate_key /volume1/web/sdeno.com.key;   #将domain.key替换成您证书的密钥文件名。
    #ssl_session_timeout 5m;
    #ssl_ciphers ECDHE-RSA-AES128-GCM-SHA256:ECDHE:ECDH:AES:HIGH:!NULL:!aNULL:!MD5:!ADH:!RC4;  #使用此加密套件。
    ssl_protocols TLSv1 TLSv1.1 TLSv1.2;   #使用该协议进行配置。
    ssl_prefer_server_ciphers on;
之后重启 systemctl restart nginx