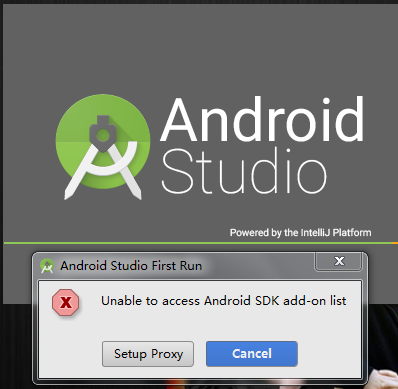
在第一次安装AS,启动后,检测到电脑没有SDK。
解决方案:
在 Android Studio 安装目录 bin/idea.properties 文件最后追加一句
disable.android.first.run=true
在第一次安装AS,启动后,检测到电脑没有SDK。
解决方案:
在 Android Studio 安装目录 bin/idea.properties 文件最后追加一句
disable.android.first.run=true
小程序 浮动 拖拽 按钮
不借助movable-area自带的组件,实现拖拽效果
wxml
<button catchtouchmove="buttonMove" catchtouchstart="buttonStart" catchtouchend="buttonEnd" style="top:{{buttonTop}}px;left:{{buttonLeft}}px;width: 50px;height:50px;border-radius:50px;position:fixed;background:#ff6700;line-height:50px;font-size:25pt;color:#fff;">+</button>
js:
var startPoint;
Page({
  data: {
  buttonTop: 0,
  buttonLeft: 0,
  windowHeight: '',
  windowWidth: ''
},
onLoad: function (options) {
  var that =this;
  wx.getSystemInfo({
    success: function (res) {
      console.log(res);
      // 屏幕宽度、高度
      console.log('height=' + res.windowHeight);
      console.log('width=' + res.windowWidth);
     // 高度,宽度 单位为px
     that.setData({
        windowHeight: res.windowHeight,
        windowWidth: res.windowWidth
      })
    }
  })
},

onShow: function () {

},

buttonStart: function (e) {
   startPoint = e.touches[0]
},
buttonMove: function (e) {
  var endPoint = e.touches[e.touches.length - 1]
  var translateX = endPoint.clientX - startPoint.clientX
  var translateY = endPoint.clientY - startPoint.clientY
  startPoint = endPoint
  var buttonTop = this.data.buttonTop + translateY
  var buttonLeft = this.data.buttonLeft + translateX
  //判断是移动否超出屏幕
  if (buttonLeft+50 >= this.data.windowWidth){
     buttonLeft = this.data.windowWidth-50;
  }
  if (buttonLeft<=0){
     buttonLeft=0;
  }
  if (buttonTop<=0){
     buttonTop=0
  }
  if (buttonTop + 50 >= this.data.windowHeight){
     buttonTop = this.data.windowHeight-50;
  }
  this.setData({
     buttonTop: buttonTop,
     buttonLeft: buttonLeft
  })
},

buttonEnd: function (e) {

}

})
https://blog.csdn.net/jiang18238032891/article/details/88721165
Now you can provide attr “wx:key” for a “wx:for” to improve performance.
上文为警告,不处理不影响程序运行。
在wx:for后面添加wx:key=”key” 可消除警告。
如图所示:

加wx:key=”key”的作用就是,有数据改变时就重新渲染,没数据改变时不会再次渲染为了提供性能。
预览 上传图片 视频 预览
html:
<video src="" id="video0" controls="controls"></video>

<input type="file" id="video" name="video"/>
js代码:
// hTML5实现表单内的上传文件框,上传前预览视频,刷新预览video,使用HTML5 的File API,
// 建立一个可存取到该file的url,一个空的video标签,ID为video0,把选择的文件显示在video标签中,实现视频预览功能。
// 需要选择支持HTML API的浏览器。
$("#video").change(function(){
   var objUrl = getObjectURL(this.files[0]) ;

   if (objUrl) {
      $("#video0").attr("src", objUrl) ;
      //img.src=objUrl ,图片预览也类似
   }
}) ;


//建立一个可存取到该file的url,  createObjectURL兼容处理
function getObjectURL(file) {
  var url = null ;
  if (window.createObjectURL!=undefined) { // basic
    url = window.createObjectURL(file) ;
  } else if (window.URL!=undefined) { // mozilla(firefox)
    url = window.URL.createObjectURL(file) ;
  } else if (window.webkitURL!=undefined) { // webkit or chrome
    url = window.webkitURL.createObjectURL(file) ;
  }
  return url ;  //输出格式 blob:http://localhost:8082/dd56dfec-12ef-4532-ae88-f1a2e6802f2c
}
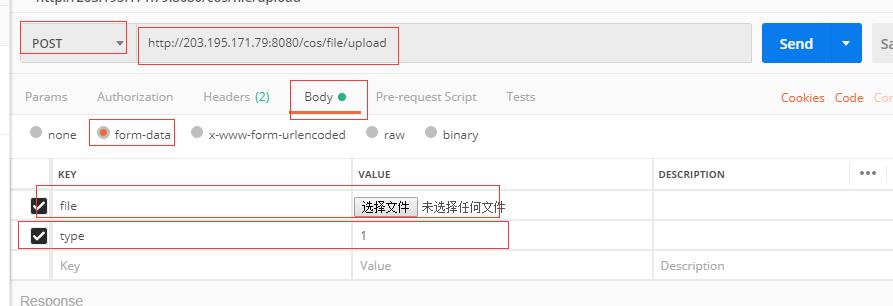
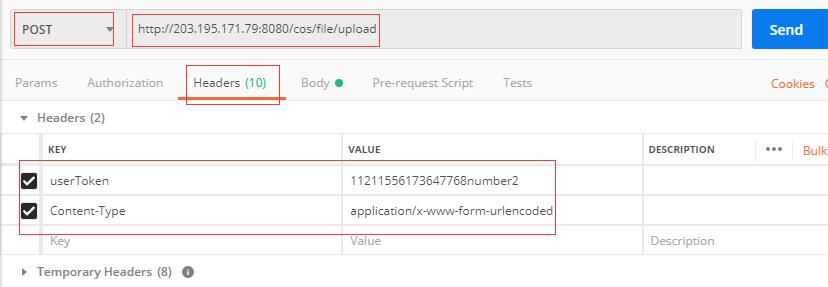
上传 blob格式的内容
var formData = new FormData();
formData.append("type","2");  //提交type=2的值给后台
formData.append("file",blob,"recorder.mp3");  //提交blob数据给后台

// console.log(formData.values());
for (var value of formData.values()) {
console.log(value);
}


$.ajax({
 url:"xxx" //上传接口地址
 ,type:"POST"
 ,contentType:false //让xhr自动处理Content-Type header,multipart/form-data需要生成随机的boundary
 ,processData:false //不要处理data,让xhr自动处理
 ,data:formData
 ,success:function(v){
    console.log("上传成功",v);
 }
 ,error:function(s){
   console.error("上传失败",s);
 }
});